
INTRODUCTION
Our SIMPLE BERRY CBD Seed was chosen from over 100 different varieties. It is ideally suited for amateur gardeners as it is considered particularly easy to care for. Due to its robust characteristics, the CBD plant can be grown indoors as well as outdoors without any problems. But how do you successfully cultivate your own CBD seeds after purchase so that you too high-quality CBD flowers received? Here you'll find a detailed guide to growing CBD seeds. A complete step-by-step guide to ensure successful cultivation!
GROWING CBD SEEDS - INTRODUCTION AND OVERVIEW
Like all plants, the cannabis plant also goes through a series of life stages. These are divided as follows: the germination, seedling, growth and flowering stages. Each stage brings its own challenges.
To provide you with optimal support even after purchasing your CBD seeds, we have put together a guide on how to achieve the best possible yield with minimal effort. In doing so, we will walk you through the various stages of the cannabis plant's life cycle step by step and assist you with tips and tricks.
The first decision you need to make is where you would like to grow. With the right light and heat conditions, CBD seeds can be grown indoors 365 days a year.
However, if you want to grow CBD seeds outdoors, the climate must be warm. We therefore recommend that you start sowing after the Ice Saints (approx. from mid-May) at the earliest. We also recommend pre-germinating the CBD seeds indoors for outdoor cultivation. A sunny spot, e.g. on a sunny windowsill, is ideal.
But so as not to anticipate everything, we'll take it step by step and week by week:
GERMINATION PHASE OF THE CBD SEEDS (WEEK 1)
In the germination phase, the CBD seed begins to sprout. The first roots and leaves are formed. In this phase, the seedling likes warm temperatures and plenty of moisture. We use a small propagator for this step. Such a greenhouse is characterised in particular by the fact that the desired humidity can be regulated very easily.
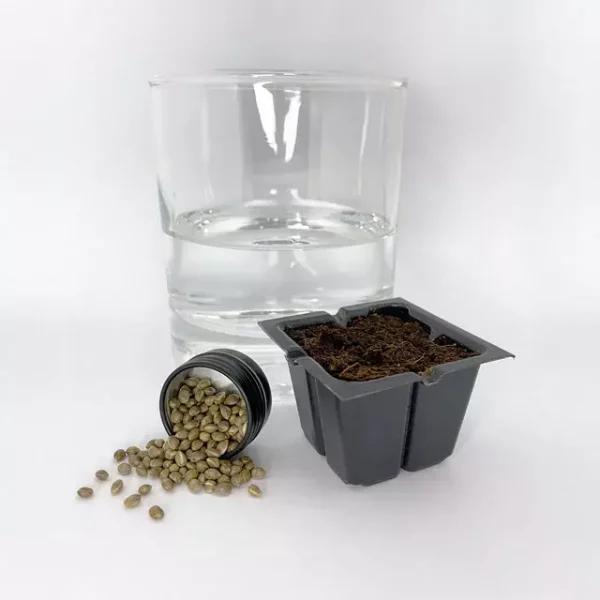
Step 1:
Immerse the CBD seed in a glass of water overnight to soften its hard outer layer. This process makes it easier for the plant to germinate later.
Step 2:
Fill a small flower pot with loosened, lightly fertilised soil or potting compost. Make sure that the pot has drainage holes in the bottom to prevent waterlogging.
Step 3:
Place the soaked CBD seed approx. 5-10mm deep into the filled pot. Cover the seed with a layer of soil and press the substrate down lightly.
Step 4:
Water the pot thoroughly with water. Make sure that the soil is evenly moistened but does not overflow.
Step 5:
Place the pot in a warm, bright place. Cannabis seeds require a temperature of around 20 degrees for optimum germination.
Step 6:
A little patience is now required, as germination can take up to 10 days. As soon as the seedling appears, it is important to pay particular attention to the environmental factors. Ideally, the humidity should be between 55% and 65%. CBD seeds also require a temperature of 20 to 25 degrees in order to germinate optimally.
SEEDLING PHASE OF THE CBD SEED (WEEK 2 - 5)
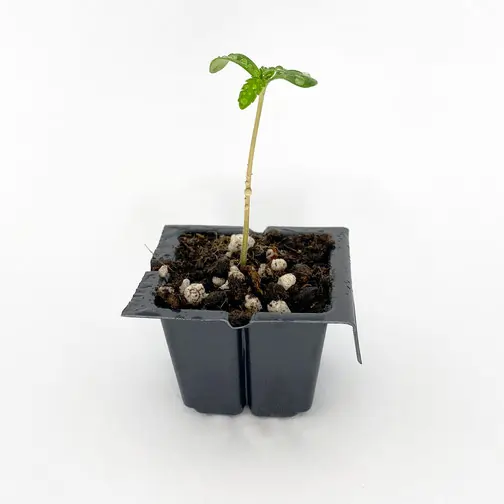
In the seedling phase, the CBD plant begins to grow and form its first characteristic cannabis leaves. During this phase, the plant needs plenty of light - but water and fertilisers should still be used sparingly. Care should also be taken to maintain a moderate humidity level of around 60 per cent. During this phase, young plants are particularly susceptible to diseases such as mould. If you have a propagator, you can now place the pot in it. Make sure that the lid does not mist up and open the ventilation controls if necessary.
Step 1:
Now check the growth progress of the CBD plant daily. Pay particular attention to a balanced moisture and temperature balance. If the soil starts to dry out, ideally use a spray bottle filled with water. Now carefully spray the plant and the substrate with water. Always take care to avoid waterlogging.
Step 2:
As soon as the CBD seedling repeatedly forms its characteristic five- to seven-fingered fan leaves, the actual growth phase begins for the plant. Now is the time to repot the CBD plant in a more nutrient-rich medium so that the roots can spread unhindered.
VEGETATIVE PHASE OF THE CBD PLANT (WEEKS 6 - 14)

Around 6 weeks have already passed since the CBD seeds were planted. During the growth phase, the cannabis plant forms roots, stem, branches and leaves in preparation for the subsequent flowering phase. At this stage, the young plant likes a nitrogen-rich substrate and sufficient space for root formation. While nutrient and water consumption increase continuously, the humidity should ideally stabilise at around 50% towards the end of the growth phase. An ambient temperature of 20-25 degrees Celsius guarantees optimum growing conditions.
Step 1:
Before repotting, make sure that the substrate is regularly rooted and slightly dry. Fine, visible root ends at the drainage openings often indicate the right time. A pot with a capacity of around five to seven litres is initially suitable so that the plant can continue to develop its root network optimally. Now fill the container with a high-quality, lightly pre-fertilised potting soil with the longest possible nutrient supply.
Step 2:
Press the soil down lightly and make a depression in the centre of the pot with your fingers. Now place the root ball of the plant in this depression, cover with a layer of substrate and press down lightly.
Step 3:
Water the plant carefully with water. Make sure that the substrate is evenly moistened but not soaked: The roots will grow optimally if they have to "find" their water a little. (If the soil has not been pre-fertilised, a liquid fertiliser can be used from the second week after repotting to supply nutrients. This should have a nitrogen (N) - phosphorus (P) - potassium (K) ratio of approx. 3-2-3. Caution: Be cautious with fertiliser at the beginning of the growth stage, the young plant still needs few nutrients in this phase).
Step 4:
Now place the plant in a warm, light-flooded location. Note that the cannabis plant only needs moderate water at the beginning of the vegetative phase. However, the humidity may be slightly higher in this early period: Between 60% and 70% optimally supports the plant's growth.
Step 5:
If you are one of the more experimental growers, you can start thinking about pruning the cannabis plant from around the third week of the growth phase. This step is optional, but can have a positive effect on the yield and resilience of the plant later on. Firstly, we recommend only removing those shoots and leaves from the young cannabis plant that do not have the characteristic five to seven leaf fingers. As a rule, these are the first three leaf shoots when viewed from below.
The plant now needs some time to develop optimally from a CBD seed into a fully grown and strong plant. Continue to monitor the growth progress regularly and pay particular attention to compliance with the parameters described. As soon as the days get shorter in summer, your plant will begin to form buds - this marks the end of the vegetative phase and the beginning of the flowering phase.
FLOWERING STAGE OF THE CANNABIS PLANT (14 - 25 WEEKS)
Step 1:
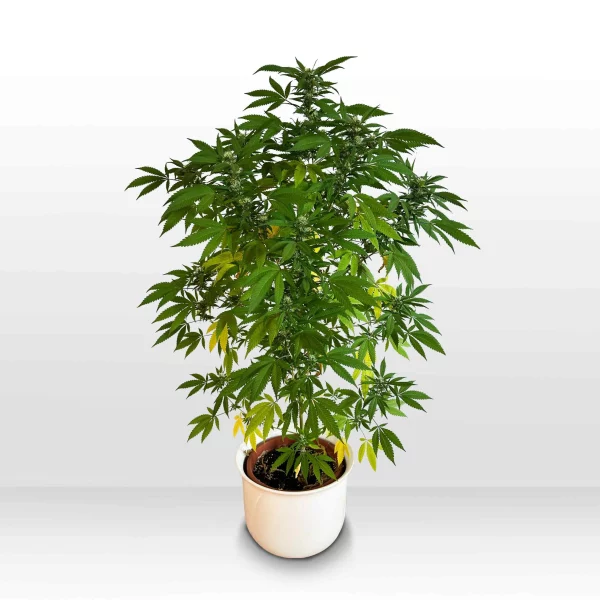
If your plant starts to form small inflorescences during the first few weeks of the flowering phase, it is still in a transitional phase. It may even intensify its growth for a short time during this period. The plant is thus preparing itself for the upcoming cold season. During this phase, the plant has an increased need for growth fertiliser (increased nitrogen content).
Step 2:
From the second week of the flowering phase, the plant intensifies its flower growth. Now is the ideal time to support your plant with an additional flowering fertiliser (increased phosphorus and potassium content). The use of an additional fertiliser is optional, but can significantly increase the yield.
Step 3:
During the third week, the plant focuses its attention primarily on flower growth, while at the same time plant growth is reduced. During this phase, the need for nutrients also changes. It is now particularly important to check the cannabis plant for signs of deficiency and oversaturation: If the leaves turn yellow or even fall off completely, the plant needs more nutrients. If, on the other hand, the tips of the leaves begin to discolour and deform, this usually indicates a nutrient burn or over-fertilisation.
Step 4:
From the fourth week of the flowering phase, the plant will gradually stop growing altogether. All the energy is now spent on flower growth. As a result, the plant will noticeably gain weight. During this phase, the need for phosphorus and potassium is particularly high.
Step 5:
Around five weeks have now passed since the start of the flowering phase. Ideally, attractive inflorescences have already formed. In the days and weeks that follow, special attention must now be paid to the fine, hair-like resin glands on the flowers, leaves and branches of the plant: As long as the majority of the so-called trichomes appear clear and translucent, it is still too early to think about harvesting. Only when the majority of the trichomes have turned an opaque golden colour is the plant ready for harvesting! For a particularly fine flower aroma, it is advisable to completely avoid adding fertiliser for the last two weeks before harvesting.
Crop determination via pistils – a note
When determining the correct harvest time, some growers rely on the coloration and recession of the so-called pistils on the flowers. However, this method can be deceptive – primarily due to the enormous variety of modern CBD flowers.
Depending on the genetics, CBD flowers can look completely different:
with stigmas that are visible very early - but discolour late, such as our Sweet Star CBD flowers,
with numerous but late-developing hairs, as with Banana Diesel or Purple Lemon CBD flowers,
or lighter structure with only sporadic pistils, as in the Habanero Kush flowers.
These optical differences are completely normal – however, they tell unreliable about when the plant is actually ready for harvesting. Some varieties develop a large number of pistils early on, others only a few or very fine ones. As a result, even experienced gardeners can misjudge the ideal time.
It is therefore always more reliable to observe the trichomes, meaning the small resin-filled heads on flowers and leaves. Their colour change – from clear to milky to slightly golden – indicates the ripeness of the plant much more precisely than the pistils.
FROM SEED TO FLOWER - HARVESTING, DRYING & FERMENTATION

Step 1:
The first step is to determine the right time to harvest. There are several indicators of this: some plants begin to develop dark, raisin-like colours with increasing age, while in others the large fan leaves gradually begin to turn yellow. Another indication of mature inflorescences are the female pistils, which initially appear as white hairs and turn a golden brown colour as they mature. If you want to know exactly and have a magnifying glass to hand, you can recognise the ideal time to harvest from the appearance of the trichomes: As soon as the majority of the small resin droplets have changed in appearance from crystal clear to amber in colour, it is time to harvest the plants.
Step 2:
When the time is right for harvesting, the plant can be cut at the bottom of the stem. The large fan leaves are then removed and the plant is hung up to dry in a dark place with low humidity (approx. 45-50%). Depending on the size of the shrub, the individual branches can of course also be cut off. As soon as the small branches of the individual twigs can be broken, the flowers are dry enough that they can be separated from the twigs. The remaining smaller leaves should now also be easy to detach from the inflorescences.
Step 3:
Freshly dried cannabis flowers often still smell a little bitter. In order to utilise the full aroma potential of the flowers, the dried buds should therefore undergo a fermentation process for a few days to weeks. On the one hand, this dries the flowers perfectly, and on the other hand, it breaks down the chlorophyll they still contain, which is often noticeable as an unpleasant scratchy sensation in the throat. Large preserving jars or similar airtight containers are particularly suitable for fermentation. To do this, fill the jars about two thirds full with dried flowers, seal them and place them in a dry, warm and dark place. The containers should be opened daily for a few minutes to allow excess moisture to escape. As soon as the surface of the flowers feels crispy, the container can be closed again.
After some time, you will notice that the flavour of the flowers becomes increasingly intense. After around 2-4 weeks, the fermentation process is complete and your own flowers from home-grown CBD seeds are ready to enjoy! Are you unsure what constitutes high-quality flowers? Here you can find out how to be able to judge the quality of cannabis flowers.

2 comments
Hi
When will it continue?
Harvest time, full stop?
Hello Phil
Thank you for your message. I apologise for the late response. Your message was hidden here from the website.
The guide has now been supplemented with the harvest step. Was this helpful?
Have you also harvested in the meantime? We would be happy about an update 🙂
Best regards, your Qualicann team